Export Micro Service
Deploying Export Micro Service on Separate Linux Server
Export micro service can also run on the same server as Izenda back-end application. For installation on same server, follow the steps mentioned here Export Micro Service
Pre-deployment steps
Node JS
Izenda Export service needs Node JS runtime environment to execute. Login as root user and run following commands.
sudo curl -fsSL https://deb.nodesource.com/setup_12.x | sudo -E bash -
sudo apt-get install -y nodejs
sudo nodejs -v
PM2
Izenda Export service leverages PM2 as process manager. Login as root user and run following commands.
sudo npm install pm2@4.5.0 -g
sudo pm2 --version
Deployment steps
Login as root user and copy Export Service at desired location. Run following commands by replacing export service archive name and port.
tar -xvf exportservice-4.0.0-linux.tgz
cd package
sudo pm2 start app.js -- --port 5775
sudo pm2 startup systemd
sudo pm2 save
sudo pm2 list
On successful completion of these commands, Export Service will start listening on specified port number.

Post-deployment steps
Apache Reverse Proxy
Login as root user and run following commands.
Update Ubuntu packages to the latest stable version:
sudo apt-get updateInstall the Apache web server on Ubuntu:
sudo apt-get install apache2 -yEnable the Apache required modules
sudo a2enmod rewrite
sudo a2enmod proxy
sudo a2enmod proxy_http
sudo a2enmod headers
sudo a2enmod ssl –- if you want to configure as SSL
sudo service apache2 restart
Verify Apache installation by running localhost.
Enter domain name in to apache2.conf file
sudo nano /etc/apache2/apache2.conf
ServerName localhost
Enter port in to ports.conf file
Sudo nano /etc/apache2/ports.conf
Listen 9001
Create 9001.conf under /etc/apache2/sites-available:
sudo nano /etc/apache2/sites-available/9001.conf<VirtualHost *:9001> ProxyPreserveHost On ProxyRequests Off ProxyPass / http://localhost:5775/ ProxyPassReverse / http://localhost:5775/ ServerName localhost ErrorLog /var/log/apache2/9001-api-error.log CustomLog /var/log/apache2/9001-api-access.log common </VirtualHost>
Active the service site.
sudo a2ensite 9001.conf
Verify the configuration:
sudo apachectl configtest. If the configuration is correct, the result will beSyntax Ok. If not, there is an issue in the configuration.Restart the website:
sudo service apache2 restart
Deploying Export Micro Service on Separate Windows Server
Export micro service can also run on the same server as Izenda back-end application. For installation on same server, follow the steps mentioned here Export Micro Service
Pre-deployment steps
Node JS
- Izenda Export service needs Node JS runtime environment to execute. Download and install Node JS from
node-v12.21.0-x64.msiby navigating to https://nodejs.org/dist/latest-v12.x/
Deployment steps
Copy export service at desired location and unzip Export Service archive. Open command prompt in administrative mode and navigate to extracted location. Run following command.
cd package
node app.js --port 5775
On successful completion of these commands, Export Service will start listening on specified port number.

Post-deployment steps
IIS Reverse Proxy
Install Application Request Routing and URL Rewrite Components
Open Microsoft Web Platform Installer’s download page. This can also be opened from IIS Manager Actions panel, “Get New Web Platform Components” link.
Download and run the installer.
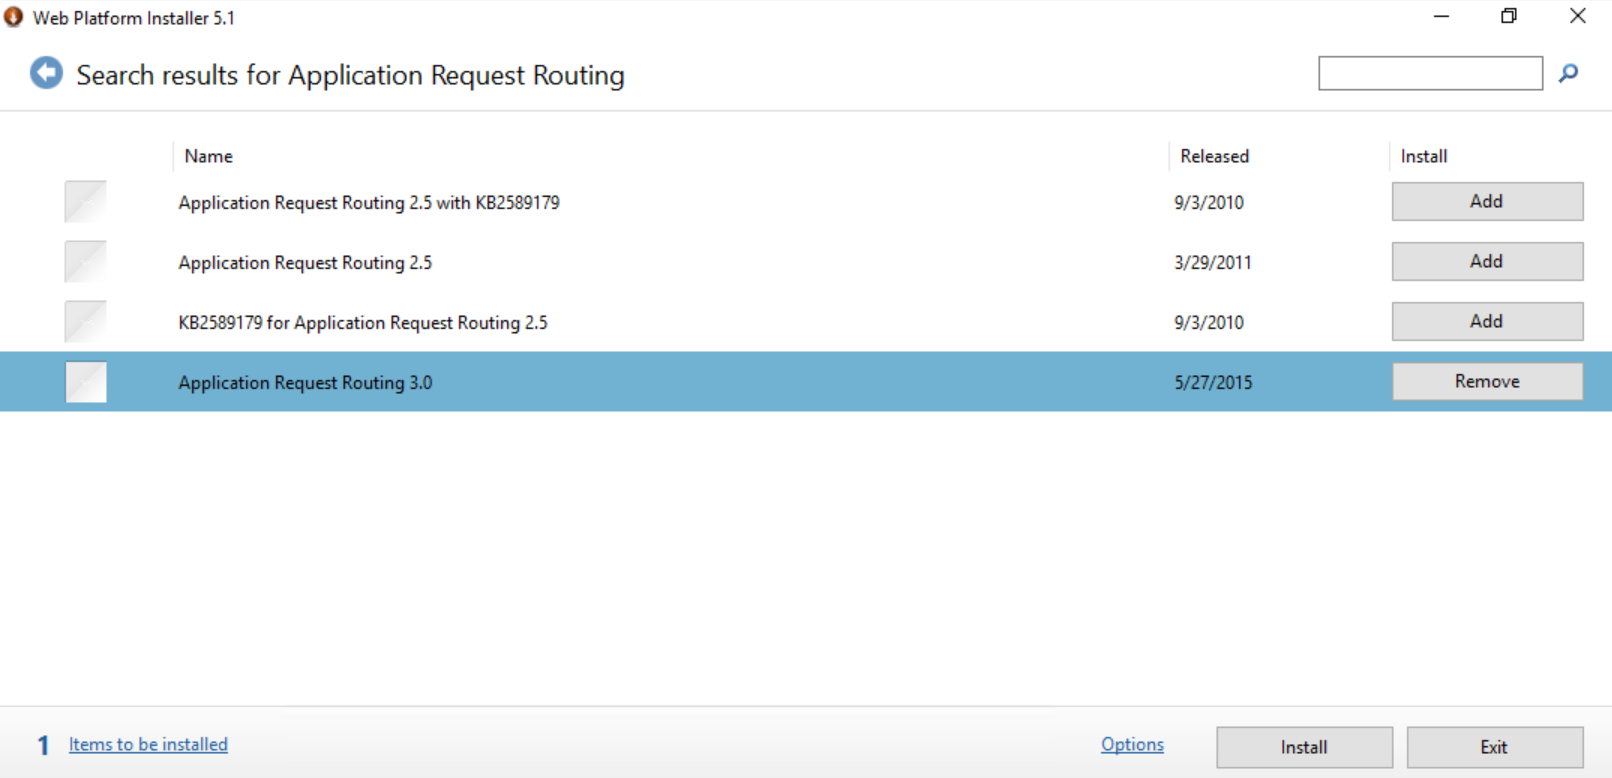
Open Microsoft Web Platform Installer.
Search for “Application Request Routing” and click Add.
Similarly search for “URL Rewrite 2.0” and click Add.
Click Install.
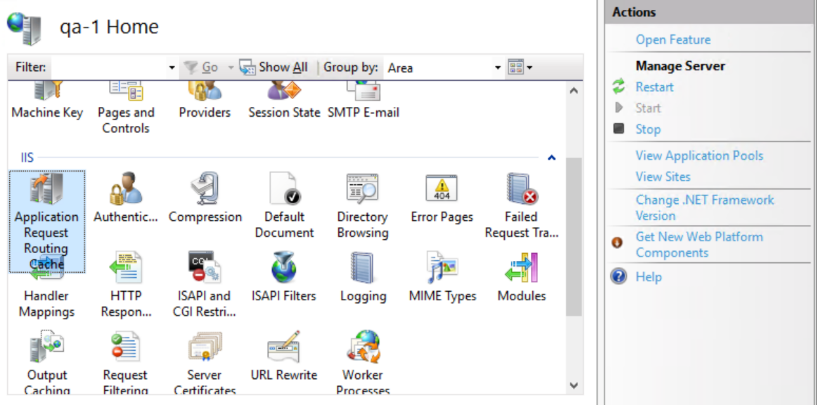
Setup Reverse Proxy in IIS. Open IIS Manager.
Select a server node in the tree view on the left hand side and then click on the “Application Request Routing” feature.
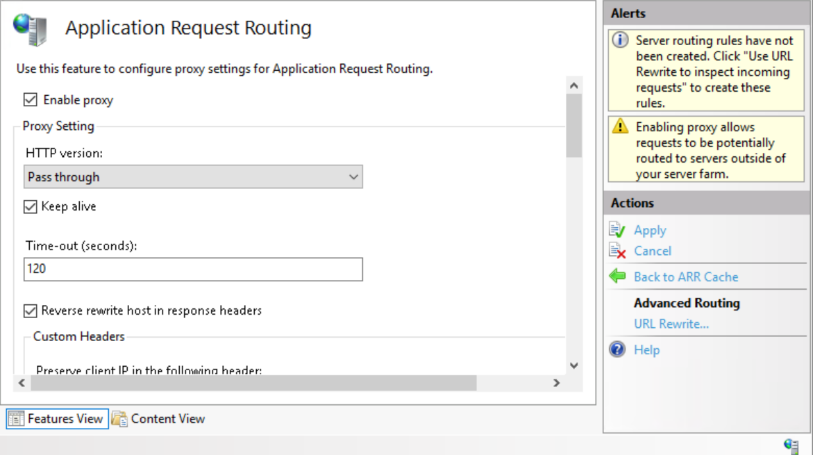
Check the “Enable Proxy” check box. Leave the default values for all the other settings on this page:
Select Apply.
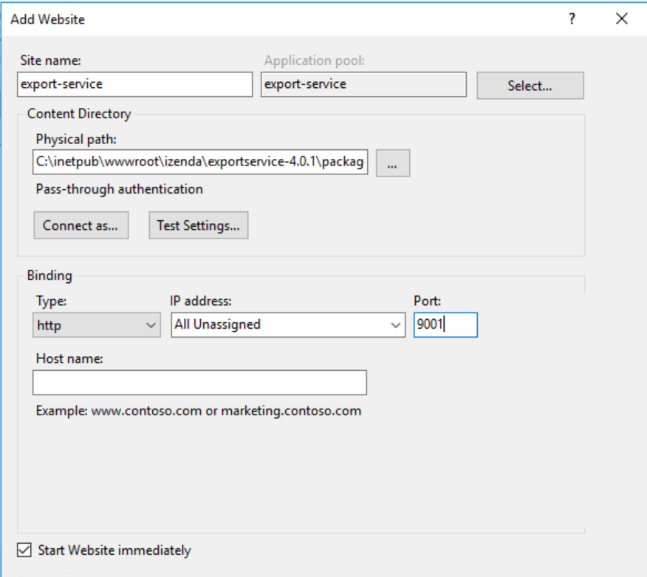
Right-click on a server node in the tree view and add a new website.
Click the ellipsis (…) button to select the location of the extracted Izenda export service containing the app.js file.
Select your website under sites in left side section. Now select “URL Rewrite” option.
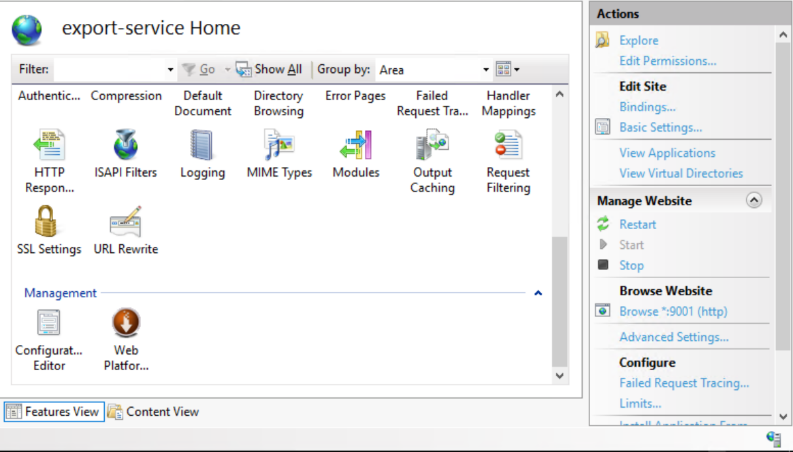
Now click on “Add Rule(s)…” in actions section on the right side.
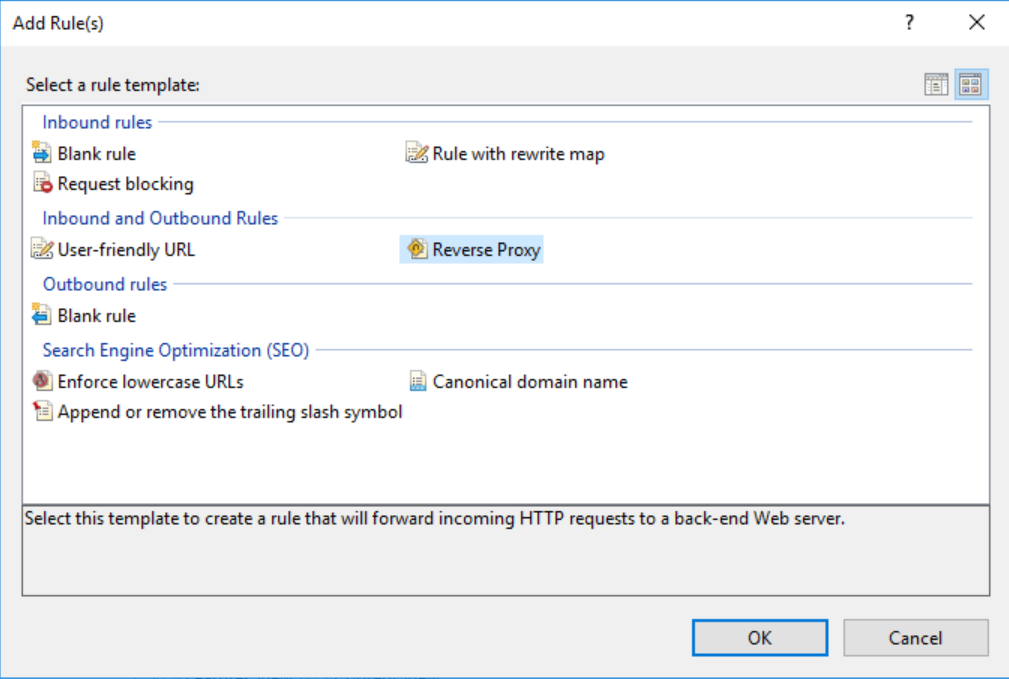
Now select Reverse Proxy under inbound and outbound section.
Add the server name or IP address with port under inbound rules input box. This is the URL of the export service running locally on the server.
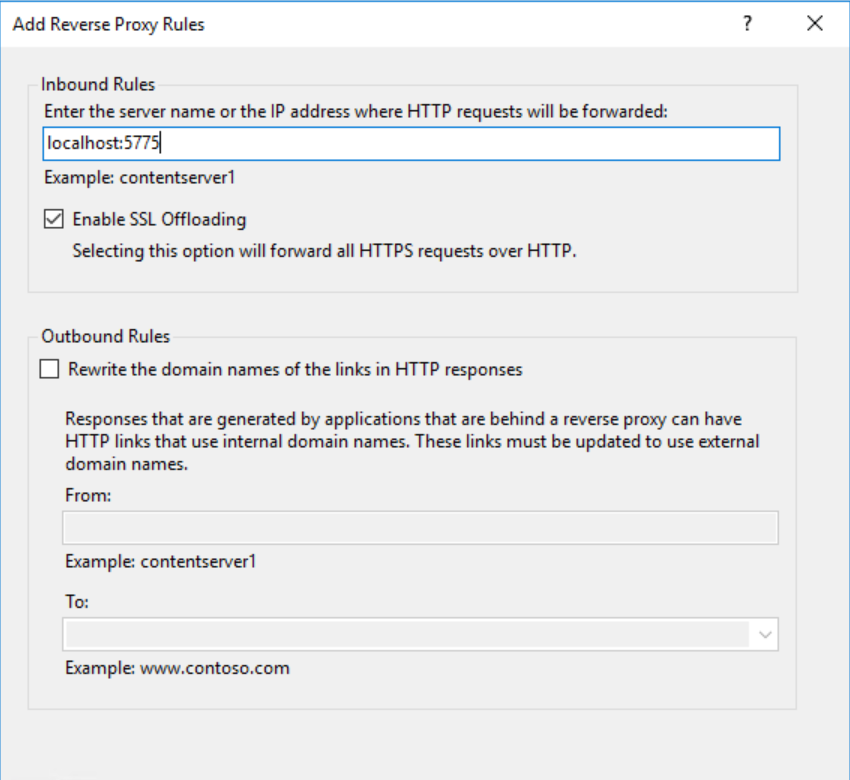
At this point, the reverse proxy setup has been done.
BI Application changes
Export micro service can be enabled by setting
EnableExportServiceto1inIzendaSystemSettingtable. Note: We strongly recommend to take backup of configuration database before running script.UPDATE IzendaSystemSetting set Value='1' where Name='EnableExportService';
Additionally, make an entry into
IzendaExportServicetable specifying URL of Export Service. For example:INSERT INTO [IzendaExportService]([Id],[Url],[RequestCount]) VALUES ('9195E7BE-96A3-4529-985A-C4DC88646FFE','http://52.152.230.0:9001',0);
Service Scalability
This is an optional step.
Export micro service is designed to scale out horizontally into multiple instances. A typical use case scenario would be a heavy load on export functionality. In such situations the load will be shared among multiple instances and multiple simultaneous exports will take relatively lesser time.
Deployment Steps
- Navigate to the location where service is extracted and simply start the service on a different port.
- Additionally, make an entry into IzendaExportService table specifying URL of Export Service. For example, if new service got started on http://52.152.230.0:9002, make an entry as following.
INSERT INTO [IzendaExportService]([Id],[Url],[RequestCount]) VALUES ('5A93C3B8-56CF-409E-B45C-2F288732A53F','http://52.152.230.0:9002',0);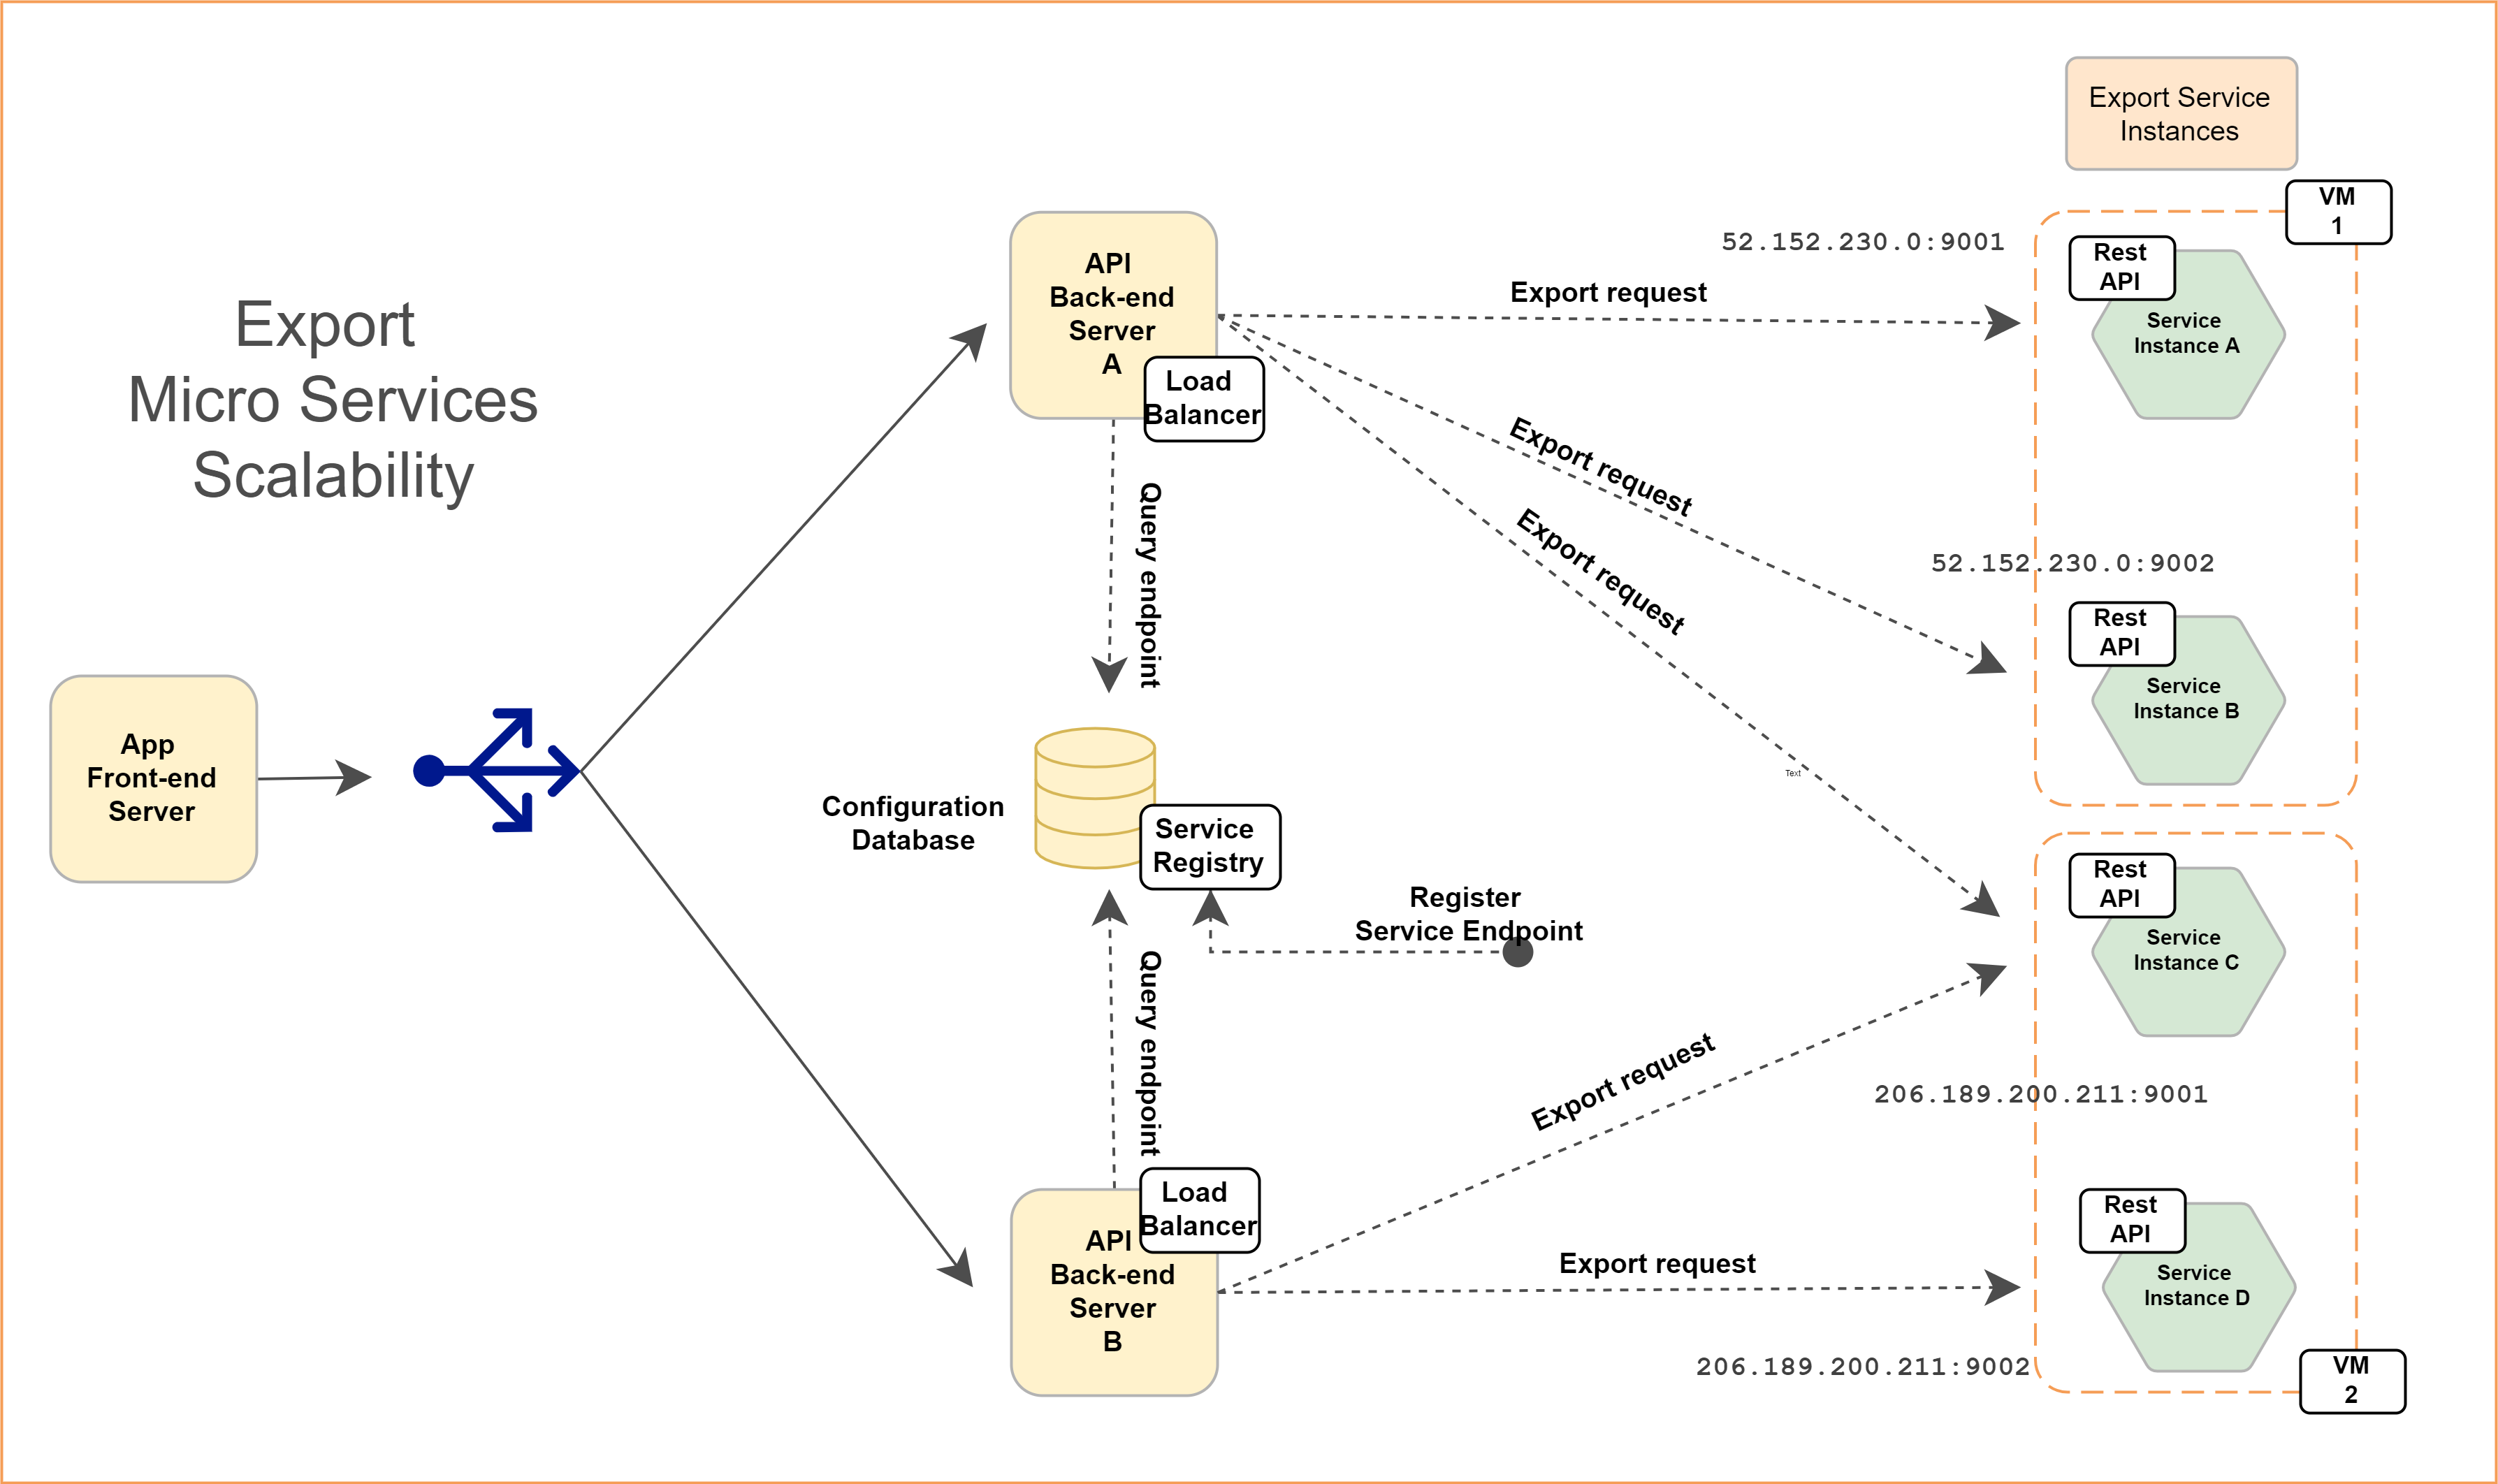
Fig. 1 Scaling export micro services