Import Report or Dashboard Definition
Note
Import Report or Dashboard Definition is available from release v2.8.0.
Import Page
The Import Page allows system admin to:
- Import reports and dashboards from definition files to system or specific tenant
- Import reports/dashboards to either Global Category or Local Category
- Configure names and locations for new reports/dashboards
- Define Database Mapping rules and validate data model consistency
- Define whether import source report settings: source report access right, the filter values
Browse File
- In browser, log in to Izenda as System Administrator.
- Select Settings, then Data Setup, then Import in the left menu.
- Select the Setting Level: either system or a specific tenant to define where the imported reports/dashboards belong to.
- In Browse Files page, drag and drop files or click on Browse Files button and select files to upload.
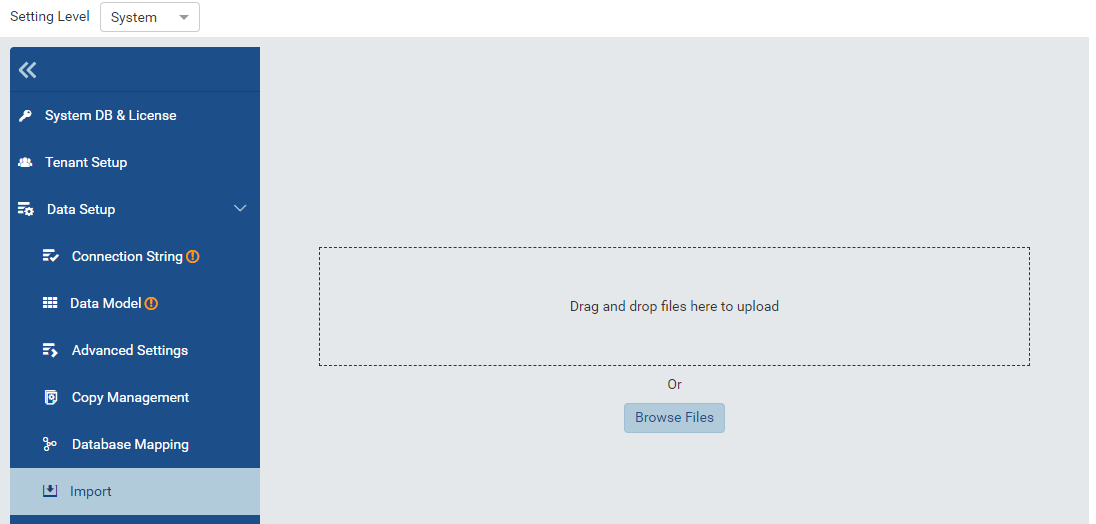
Fig. 156 Browse File
Note
Izenda only allows to import the report/dashboard definition with following formats:
- .birt: the report definition file format
- .bidb: the dashboard definition file formatThe version of definition files must be the same or older than the current Import system.
The system will store uploaded files in folder IzendaImport in the app’s directory by default. System admin can change the file storage by configuring the ImportFileSystemPath field in the IzendaSystemSetting table.
Import
After browsing files, application will switch to Import Page.
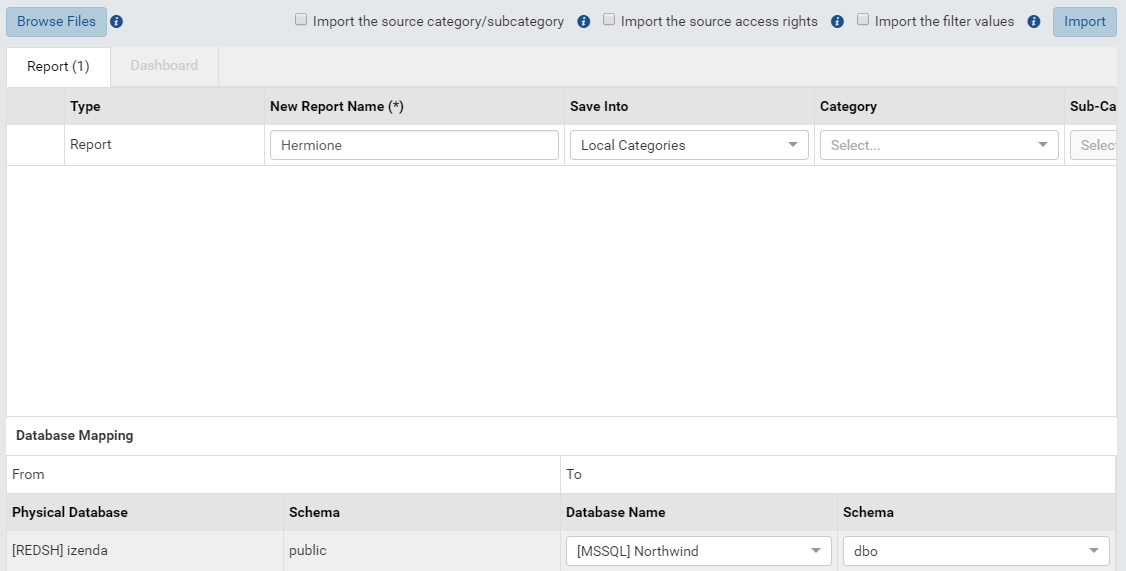
Fig. 157 Import page
- Tick the Import the source access rights check-box to import access rights to destination. Please notice that any sharing with User and not existing Role Name will not be imported. All existing sharing in destination will not be altered in case re-import without selecting this option.
- Tick the Import the filter values check-box to import filter values. The existing filter values in destination will not be altered in case re-import without selecting this option.
- Type the new name for each report and dashboard.
- Tick the Import the source category/subcategory check-box to import the source category and sub-category for all reports/dashboards. OR input the destination category and sub-category for each report and dashboard.
- Choose the destination database name and schema in Database Mapping section. To do mapping easily, click on
 icon to view Report/Dashboard Information pop-up.
 - Click Import button to execute the importing progress.
- If there is any report or dashboard duplication, the Overwrite Confirmation pop-up will display.
- Else if all validations pass, the Import Progress pop-up will display.
Note
The Import the source category/subcategory check-box is available from version 2.9.0.
A dashboard that belongs to Global Category cannot contain any local report.
All reports inside dashboard will be always overwritten when overwriting dashboard.
Click on
 icon at the end of a row to delete a definition file (that has been already uploaded by mistake) from the file storage.
The subreport link is only maintained in the following cases:
- The report and subreport(s) are imported in the same batch
- Re-import one of the reports and both the report and sub-report(s) already exist in destination
Report/Dashboard Information pop-up
The Information pop-up will list out the following information:
In Data Information section:
- Setting Level: The setting level that the source belongs to. (It can be System or Tenant level)
- Databases: All databases are being used within the report/dashboard
- Data Sources: All tables, views, stored procedures are being used within the report/dashboard
- Custom Views: All custom views are being used within the report/dashboard
- Data Model Calculated Fields: All data model calculated fields are being used in the report/dashboard
In Access Rights section: All sharing with existing Roles and Everyone
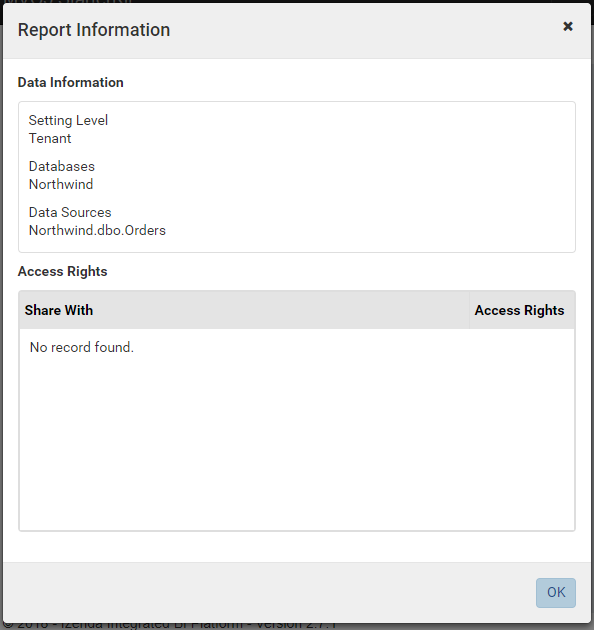
Fig. 158 Report Information pop-up
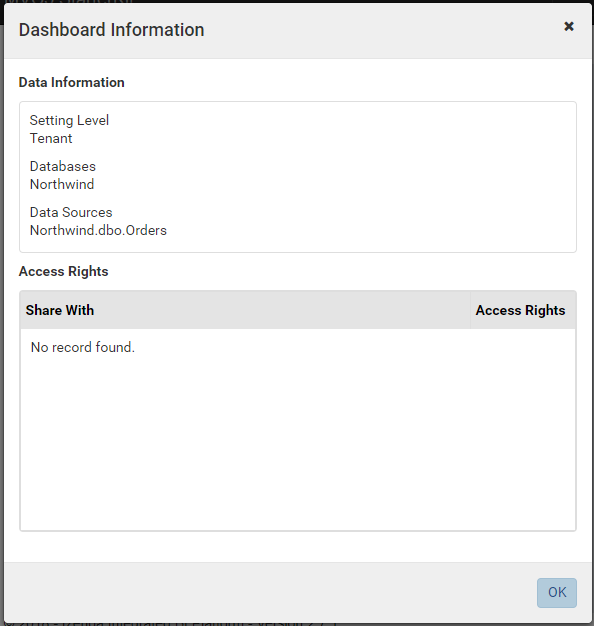
Fig. 159 Dashboard Information pop-up
Overwrite Confirmation pop-up
The Overwrite Confirmation pop-up displays all existing reports and dashboards with their Category/Sub-category. System admin can specify reports or dashboards to overwrite by ticking on the checkboxes then click OK button.

Fig. 160 Import Reports/Dashboards - Overwrite Confirmation popup
Note
- The reports inside dasboard will not be listed in the pop-up because they will be always overwritten if existing in destination when overwriting the dashboard they belong to.
- A report/template/dashboard is considered as duplicate when its sourceID exists in destination not its name.
Import Progress pop-up
- The Import progress pop-up shows the status of all importing transactions.
- Click on Cancel the Import button will abort the progress except the completed imported reports and dashboards.
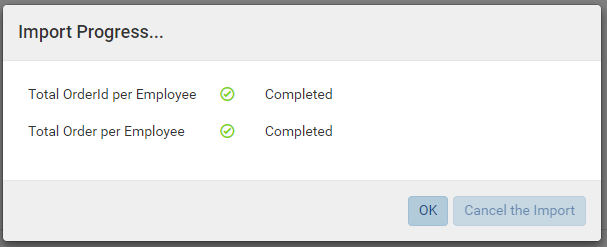
Fig. 161 Import Progress pop-up
Import History Page
The Import History Page allows system admin to:
- View the system’s or specific tenant’s imported reports/dashboards definition history
- Single sort the history list
- Delete all history or specific records
View Import History
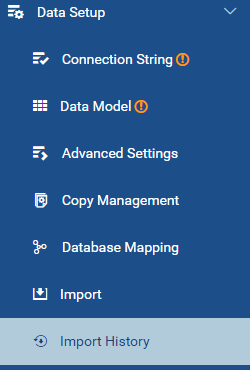
Fig. 162 Data Setup > Import History
- In browser, log in to Izenda as System Administrator.
- Select Settings, then Data Setup, then Import History in the left menu.
- Select the Setting Level: either system or a specific tenant.

Fig. 163 Import History
Each row of the history list is a record of a import transaction with the following information:
| Field | Description |
|---|---|
| File Name | The name of the imported file |
| Type | The type of the imported file (Report, Template or Dashboard) |
| Imported Date | The date when the file was imported |
| Importer | The name of the importer with format: <First Name> <Last Name> |
| Import Status | The status of the imported file (Completed or Error) |
| Failure Error | The reason of failure (blank in case completed import) |
| Report/Dashboard Name | The name of the report or dashboard in destination |
| Save Into Only available for System Setting Level |
Whether the report/dashbord is imported to global or local category |
| Category | The name of the destination category containing the report or dashboard |
| Sub-category | The name of the destination sub-category containing the report or dashboard |
Delete history
User can click on the icon at the end of a row to delete this row or delete multiple rows by selecting the checkboxes then choosing Delete button.
Note
When deleting a record, it will be hard removed from the database.